Did you ever hear about the “Office Groups”? They are the technical base of teamwork within Microsoft 365. What is your first association when you hear the word “team” or “group”? I’m thinking of the people I work with in a team or a group. My second idea is concerning the roles and responsibilities and after this some tools come into my mind. But at first, it’s all about people.
And this is the concept of Office Groups:
- Create a group (that’s already an Office Group), name it and add people to this new group
- Assign roles (and responsibilities) to the several group members
- Select the tools needed to support this group in achieving their goals
Do we need tools to support teamwork?
The answer can be “No”; especially small teams with all team members working in the same room won’t probably see an advantages in the usage of some collaboration tools. But when your team grows and you have to split up into multiple rooms or some of your team members are working at a different location (e.g. homeoffice), you may change your mind.
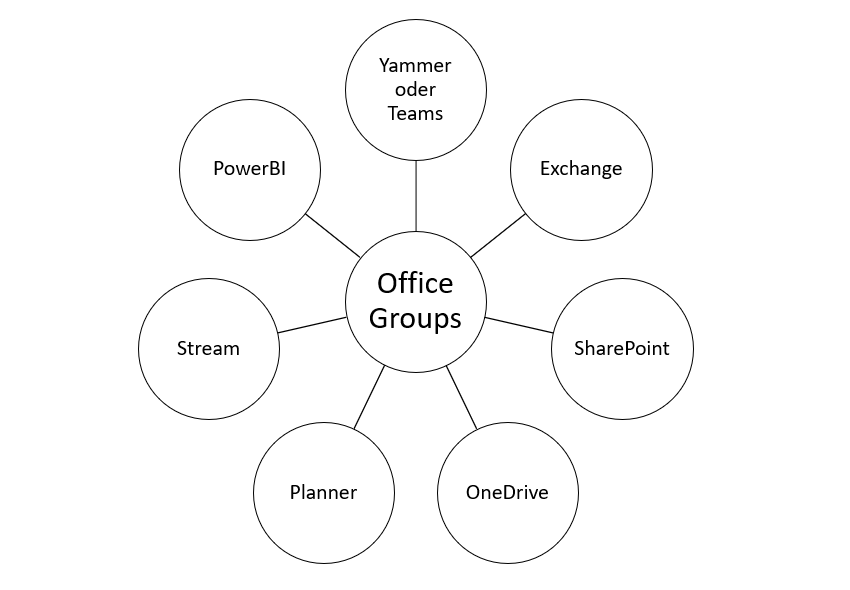
Each group or team can have different requirements regarding the support of teamwork. For example, one team needs a common email inbox and a group calendar such as a central location to work together on documents and another team wants to discuss topics and needs a central task list. Office Groups offer this flexibility with the option to add exactly these tools to your team workspace which are needed by your team.
Example: Group with a common email inbox
So far, the first step to support team collaboration was to create a folder on a fileshare and an email distribution list or a shared email inbox.
Now, if you create an Office Group, the tools required for team communication and a common file storage will be set up automatically. In addition, a team can also use other services offered in Office 365 as from a toolbox and thus take care of the individual needs of the team.
This can be better illustrated with a specific case. For example, when you create a workspace in SharePoint, the following components are available to you and your team:
- Teamsite with central document storage: You can adjust the teamsite to your individual needs by using standard SharePoint components like a hyperlink list or a OneNote notebook. You and your team members will also find this teamsite via SharePoint Home and can follow this website.
- Common email inbox: You can compare this inbox with an email distribution list; but quite more with a shared email account. By using this inbox for your communication with other people (like customers or other colleagues who aren’t members of this group), everybody in your team is up2date and can work on the received messages.
- Group calendar: You will see the calendars of all team members and it will be easy to plan meetings in your team by adding the meeting to the group calendar and inviting your team.
- Shared Notes: You can use a shared OneNote notebook to share notes, ideas and documentations.
- Task management: You can use Planner or To-Do to manage your tasks. Planner offers the possibility to work with some kind of Scrum or Kanban board to visualize your work streams and check your tasks in your team.
Should I create a public or a private group?
When you create a new group, you will be asked for the privacy settings. You can decide if you want to set up a public or a private group:
- Public: Everybody in your organization can access this group and the content shared there. If you find a public group you want to join, you will be able to sign up as a new member without any approval step. Don’t be worried about the name “public”. The information of a public group will only be shared within your organization. Nobody outside of your organization will have access to your group except of these people who are added by a group owner as external user.
- Private: You must be added by a group owner to join a private group and only the group members can access the information shared within this group. And similar to the public groups a group owner has the possibility to add external users to a group. This enables for example collaboration with customers on a dedicated project.
In case of working with confidential information you should use a private group to control who has access to the data. In all other cases, I recommend to use public groups. People will have the chance to join conversations and meet other people they don’t work with regularly.
Every team and every group of people can have different needs to work together. You need to identify your use cases and check what is missing in your daily business. I will go through this topic in one of my next posts.

Leave a comment